simtrack1-ai-drive
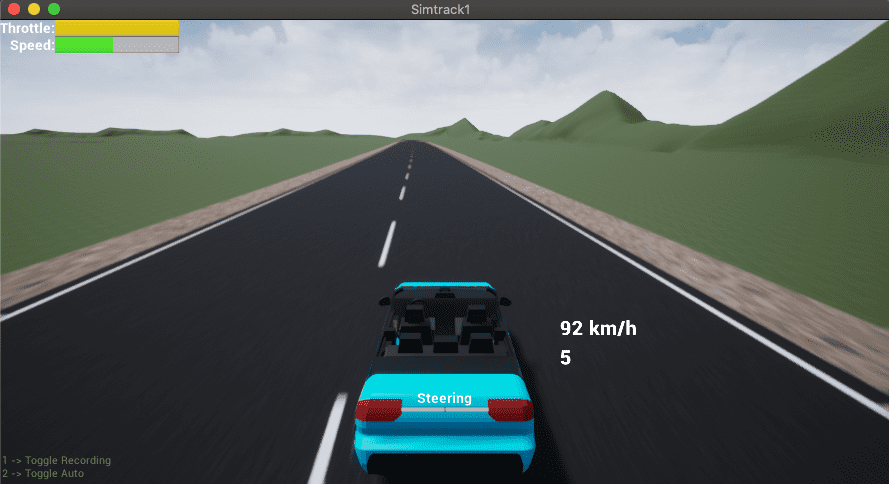
Simtrack1 is an Unreal Engine 4 based vehicle simulator. The initial release, is focused on ensuring that telemetry and camera data can be recorded, to train a Deep Learning AI model. That subsequently can be used to automatically control the vehicle in the simulator - thus making it self driving.
This repository contains the tools for data analysis of the recorded data, a sample model training approach and a socket.io python server script to use a trained model, via a centre camera & telemetry data, to give instruction for steering and throttle back to the simulator.
Environment setup
Simulator
The simulator at this time, requires a discrete video card to run. Some CPU only PCs or laptops, will not have enough video memory. For model training, testing has only been performed with a CUDA based GPU using Tensorflow 2.0.
To download the simulator use the following links
- Linux (if Vulkan does not work try adding -opengl to the command line. UE 4.23 will freeze your PC if you don't have enough video memory available ie no GPU)
- MacOS (requires latest metal based OS - used Catalina 10.15.1 for testing and the creation)
- Windows 64 - coming soon (don't have access to a Windows machine and unable to cross compile the simulator)
Unzip into a directory. The program is called SimTrack1. When you start the following menu will be displayed

Use Options menu, to save where recorded data is stored and which socket.io url is used in auto mode, to steer & control the throttle.

Joystick
You are able to control the vehicle with either AWSD keys or the arrow keys, where up/down changes the throttle. This works fine when practicing to drive in the simulator.
However the input, the vehicle is using for steering is either [-1,0,1] in that case. Analogue input in the range [-1.0,1.0] is required for recording. To achieve this working with Unreal Engine, on a Mac, the steam engine joystick desktop configuration most be setup, such that joystick movement does not translate to DPAD LEFT & DPAD RIGHT. The Steam client must be left running.
The following screen shot is for a steam controller

A PS4 conroller will work connected via bluetooth to macOS Catalina, without the steam client.
Successful joystick configuration can be gauged by looking at the on screen steering indicators.

If it is fully blue, for either left or right, binary steering is occurring. If it is incrementally increasing left or right, then analogue steering is happening. Analogue steering is required for recording data for the purpose of training a model.
Setting up JupyterLab Notebooks and Tensorflow 2.0
To effectively train a neural net, based on captured data, you need a CUDA enabled GPU. Tensorflow 2.0 only works with CUDA 10.0.
Once setup, follow these instructions to create an environment inside of anaconda that can be used for Jupyter Labs Notebooks and model training
conda install -c conda-forge jupyterlab nb_conda_kernels
conda create -n simtrack1tf2 python=3.6 cudnn cupti \
cudatoolkit=10.0 pytz matplotlib scipy opencv \
pillow pyyaml moviepy imageio-ffmpeg \
requests python-socketio eventlet
conda activate simtrack1tf2
pip install --upgrade tensorflow-gpu
pip install tensorflow-addons --user
pip install ray --user
pip install attr --user
pip install attrs --user


export FFMPEG_BINARY=`which ffmpeg`
The Ray Project is used to parallelise the augmentation and generation of training and validation data.
Data Capture and Recording
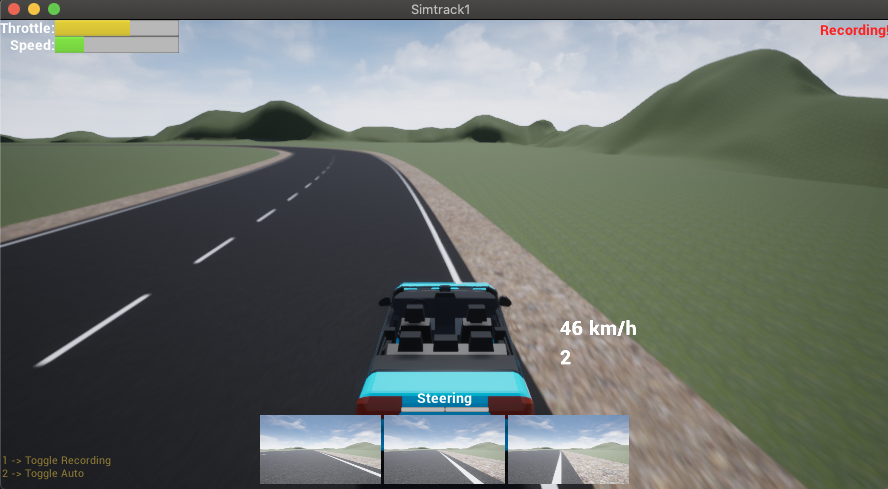
To initiate recording inside simtrack1, press the 1 key. It will toggle recording on off.

When recording is active, you'll see a red "Recording!" in the top right, as well as a viewport of the three cameras (front - left, centre and right) being captured.
The data is stored in a time stamped directory, which is created once for each simulator session, upon the first record toggle on. The time stamped directory will be created, under the data recording directory specified under the options menu. Each camera image is stored in a unique OID jpg file. The vehicle_state.csv file is appended to with the telemetry data and reference OIDs for each 256x256x3 jpg image captured from the cameras. The CSV file has the following fields:
| Field | Unit | Description | |:--|:--|:--| | Timestamp | Iso8601 | Timestamp string of when the vehicle state was captured | | Speed | float | Speed of the vehicle in kilometres per hour | | Throttle | float | The throttle has a range [0.0,1.0] | | Steering | float | The steering input value in the range [-1.0, 1.0] | | Engine RPM | float | Engine RPM | | Gear | int | Current automatic gear selected | | Front Left Camera | OID | The OID for the jpg image for the camera | | Front Center Camera | OID | " as above | | Front Right Camera | OID | " as above |
Initial data exploration
After recording data, it is time to look at the data collected. A sample Jupyter notebook is included initial-simtrack1-data-exploration.ipynb. Please modify the data_path to point to the directory that you want to use.
The full example repo is available at simtrack1-ai-drive.
Training
A sample training model - model_ray.py has been included. It will train a model, that captures your driving style around simtrack1. Please alter the data_path as well as the num_threads in the gen_data procedure to match the number on your machine.
Ray is used to parallelise the data. OpenCV is used for augmentation. Commented code has been left in with alternate approaches.
The neural net model used is based on the NVIDIA End to End Learning for Self-Driving Cars paper. Activation was changed from ELU to Swish - (article explaining Swish) with Rectified Adam (article explaining RAdam) as the optimizer.
Once the data_path variable has been updated simply run it with python model_ray.py after activating the simtrack1tf2 conda environment created earlier.
Driving the vehicle in simtrack1 using the trained model
A socket.io server is available as drive.py. If the data captured is sufficient and training was successful, then run via python drive.py. Note the throttle is hard coded to 0.65 which will give a constant speed of 28 km/h inside the simulator.
Start simtrack1 and press 2 to initiate auto mode.

You'll note a purple "Auto" indicator top right and a single middle camera viewport. You'll see in the terminal where the socket.io server is running when the simulator connects, as well as the steering and throttle values returned. In simtrack1, the vehicle will start moving and steering. For troubleshooting some code has been left commented out to save last images in drive.py.
Good Luck
Hope you give this a try and get some self driving happening. I've personally found it very interesting creating this. Please remember that this is an initial release. Happy to help if you get stuck.
